Amy Patterson is a mother of three who has mastered the art of canning to feed her family with nutritious meals. She loves to share her practical tips and family-friendly recipes on the blog.
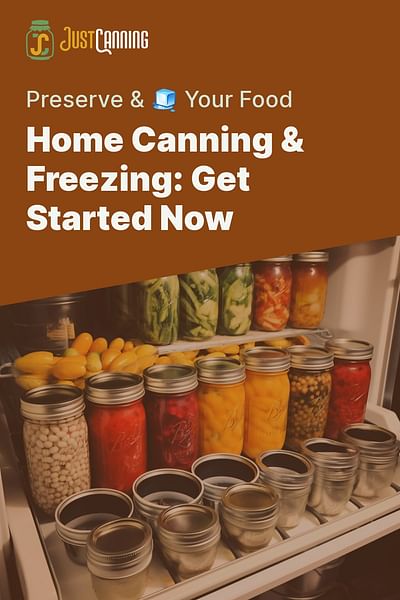
Welcome to the wonderful world of canning and freezing food at home! Have you ever wondered how you can make the most out of your garden's bounty, or how to save money by preserving seasonal produce? Well, you're in the right place. Canning and freezing are not only practical skills but also rewarding ones. They allow you to save money, reduce waste, and ensure that the freshness and nutrition of your produce are preserved. If you're new to this, you might want to start with our guide on how to begin canning food at home.
Imagine opening a jar of homemade strawberry jam in the middle of winter, or enjoying your garden's green beans long after the growing season has ended. That's the beauty of home food preservation. It's like capturing a moment in time, preserving the peak freshness of your produce for you to enjoy later. If you're interested in learning more about food preservation, you might find our article on essential camping food preservation techniques helpful.
Whether you're a seasoned gardener looking to extend the life of your harvest, or a beginner interested in DIY canning and freezing, this guide is for you. We'll cover everything from the canning basics for beginners to simple canning recipes. If you're interested in safety measures while canning, do check out our article on common canning mistakes and how to avoid them. So, are you ready to embark on this exciting journey? Let's get started!
Let's Dive into the Basics of Home Canning and Freezing 🥫❄️
Embarking on your DIY canning and freezing journey is a wonderful way to preserve the bounty of every season. The core principles of home food preservation are surprisingly straightforward. First, sterilization is key. All your canning jars should be thoroughly cleaned and sterilized to ensure no bacteria can survive and spoil your food. This is as simple as boiling your jars, lids, and rings for about 10 minutes. You can learn more about this in our guide on the canning process.
Next, let's talk about pressure canners. If you're preserving low-acid foods like green beans or corn, a pressure canner is essential. Why? Because these foods need a higher temperature to be safely preserved, a temperature only achievable with a pressure canner. For instance, you can check out our guide on how to safely can corn for more details.
And when it comes to freezing, proper sealing is crucial. Air is the enemy of frozen food, leading to freezer burn and a loss of flavor. So, make sure to remove as much air as possible from your freezer bags before sealing them tight. If you're interested in more preservation methods, you can explore traditional ways to store and preserve fruits and vegetables.
Remember, the goal of canning and freezing food at home is to lock in the freshness and nutrition of your produce, so these steps are vital. Ready to dive deeper into the world of canning and freezing? Let's go!
Your Essential Toolkit for DIY Canning and Freezing 🛠️
Essential Equipment for Your Canning and Freezing Journey
- Canning Jars: These are your main storage containers when canning. They come in various sizes, so choose according to your needs. Remember, always opt for high-quality, heat-resistant jars for safety and durability.
- Canning Lids and Bands: These are crucial for sealing your jars. Lids should be new for each canning session to ensure a tight seal, while bands can be reused.
- Pressure Canner: A must-have for canning low-acid foods like vegetables, meats, and poultry. It helps kill bacteria and other microorganisms that can cause food spoilage.
- Jar Lifter: This tool is not just a luxury but a necessity. It helps you safely handle hot jars, reducing the risk of burns or spills.
- Freezer Bags: Ideal for freezing fruits, vegetables, and meats. Look for heavy-duty bags that can withstand freezing temperatures without cracking or leaking.
- Deep Freezer: A deep freezer provides the necessary low temperatures for long-term storage of frozen foods. It helps maintain the quality and nutritional value of your food for longer periods.
- Permanent Marker: For labeling and dating your jars and freezer bags. This helps you keep track of what's inside and when it was packed, ensuring you use your food while it's still at its best.
Your Easy-Peasy Guide to Canning and Freezing at Home 📝
Now that we've covered the basics, let's dive into the actual process of canning and freezing food at home. First things first, you need to select high-quality produce. Fresh, ripe fruits and vegetables will yield the best results. Remember, preserving won't improve the quality of your produce, it only maintains it. If you're interested in canning specific fruits, check out our guides on canning plums or canning mangoes.
Once you've selected your produce, it's time to prepare it. This could mean peeling, chopping, blanching, or cooking, depending on your recipe. For instance, if you're canning peaches, you'll need to peel and pit them first. If you're freezing green beans, they'll need a quick blanch in boiling water.
Next, you'll pack your produce into your canning jars or freezer bags. Be sure to leave some headspace to allow for expansion during the canning or freezing process. Then, it's time to process your packed produce. For canning, this typically involves a bath in a boiling water canner or a session in a pressure canner. If you're using a canning machine, be sure to check out our guide on using a canning machine. For freezing, you'll simply pop your packed bags into the freezer.
Finally, you'll store your preserved goods. Canned foods should be kept in a cool, dark place, while frozen foods obviously need to stay in the freezer. With these steps, you're well on your way to a pantry and freezer full of home-preserved foods!
To better illustrate the process of canning and freezing food at home, we've included a video tutorial below. This video, created by ToniRenee At Home - Double F Farms, is perfect for beginners who are just starting their journey in home food preservation.
The video above provides a practical demonstration of the canning process. Now that you've seen it in action, let's move on to some tips and best practices to ensure your canning and freezing endeavors are successful.
Pro Tips to Nail Your Canning and Freezing Game 🏆
As we wrap up this beginner's guide to canning and freezing food at home, let's go over some pro tips to ensure your success. First, always remember not to overfill your jars or bags. This is crucial as it allows room for the food to expand during the canning or freezing process. Secondly, make sure to check the seals on your jars. A good seal is paramount in preserving the quality and safety of your food. If you're unsure about the process, our guide on using an electric canning pressure cooker effectively can be a great resource.
Another key practice is labelling and dating each jar or bag. It helps you keep track of what you've canned or frozen and when, ensuring you use your food while it's still at its best. I can't tell you how many times I've been thankful for my labelling system when I'm rummaging through the freezer or pantry!
Finally, remember that like any other skill, home food preservation gets easier with practice. Don't get discouraged if your first few attempts aren't perfect. Keep trying, keep learning, and before you know it, you'll be a pro at DIY canning and freezing. If you're looking for a place to start, our guide on canning onions is an easy and flavorful preservation method to try.
So, are you ready to embark on this rewarding journey of canning and freezing? Remember, every jar you fill is a step towards healthier, more sustainable living. If you're interested in trying out different methods, our guide on Instant Pot canning can revolutionize your food preservation methods. Happy canning!


