
Choose your canning method
Steam canning and water bath canning both handle high-acid foods like cucumbers, onions, and pickles. The choice depends on your equipment and how quickly you want to process a batch. Steam canning uses less water and heats faster, while water bath canning is the traditional method most home canners start with.
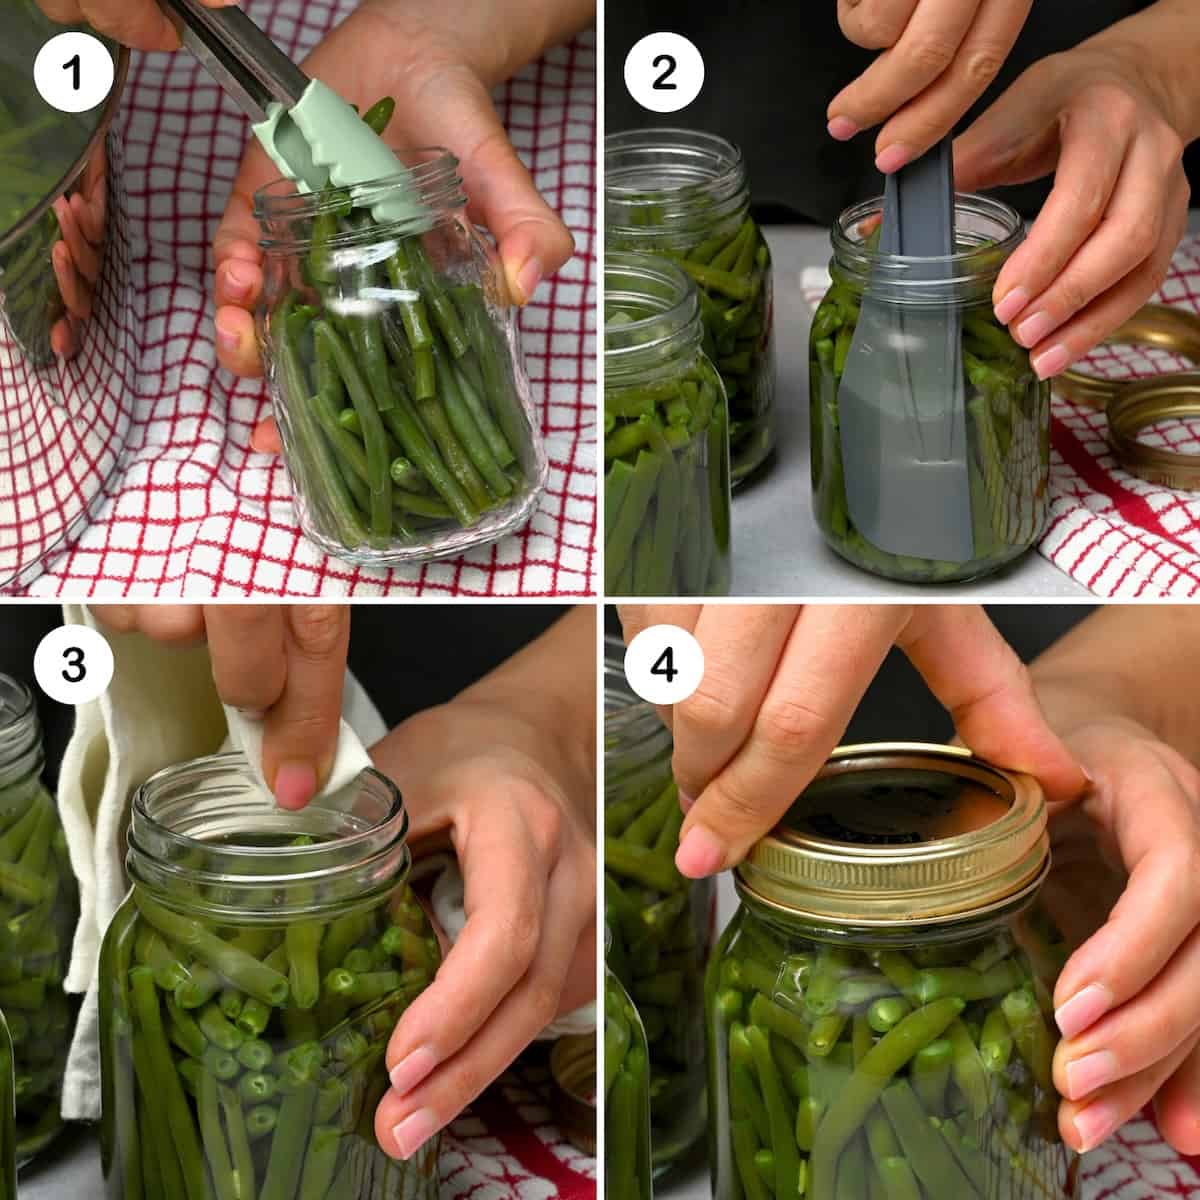
Both methods rely on boiling temperatures to kill spoilage microbes. Because cucumbers and onions are naturally acidic or typically processed with added vinegar, neither method requires the higher temperatures of a pressure canner. Using the wrong method for low-acid foods (like plain green beans) creates a botulism risk, so stick to these methods only for high-acid recipes.
| Method | Water Usage | Preheat Time | Best Use Case |
|---|---|---|---|
| Steam Canning | Minimal (1-2 inches) | Fast (10-15 min) | Quick batches, small kitchens |
| Water Bath Canning | Deep (jars submerged) | Slow (20-30 min) | Traditionalists, large batches |
Steam canning circulates boiling vapor around the jars, which reduces the time needed to reach processing temperature. This makes it ideal if you are canning in a hot kitchen or want to save on water bills. Water bath canning submerges the jars completely, which some find easier to monitor for boiling consistency but requires a deeper pot and more prep time.
For beginners, water bath canning offers a visual confirmation that the water is rolling boil, which can be reassuring. However, if you have a steam canner insert or a dedicated steam canner, the speed advantage is significant. Both methods are safe for high-acid vegetables as long as you follow tested recipes from reliable sources like the National Center for Home Food Preservation.
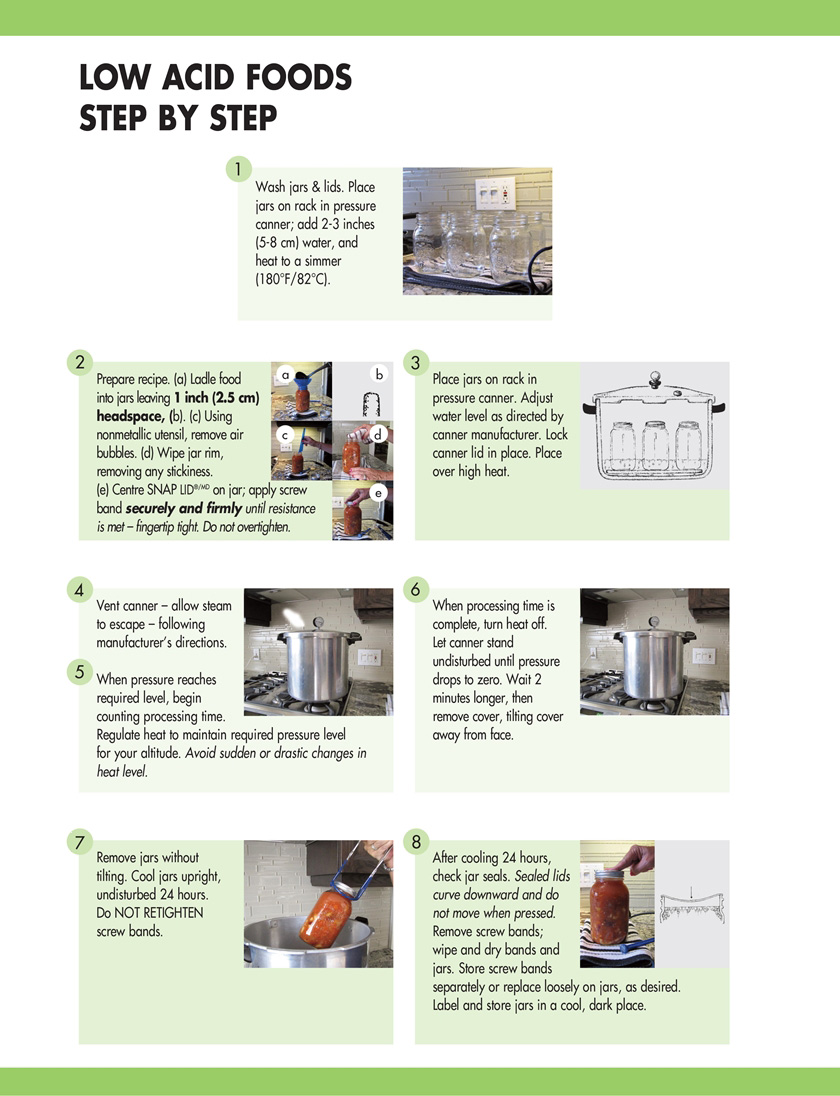
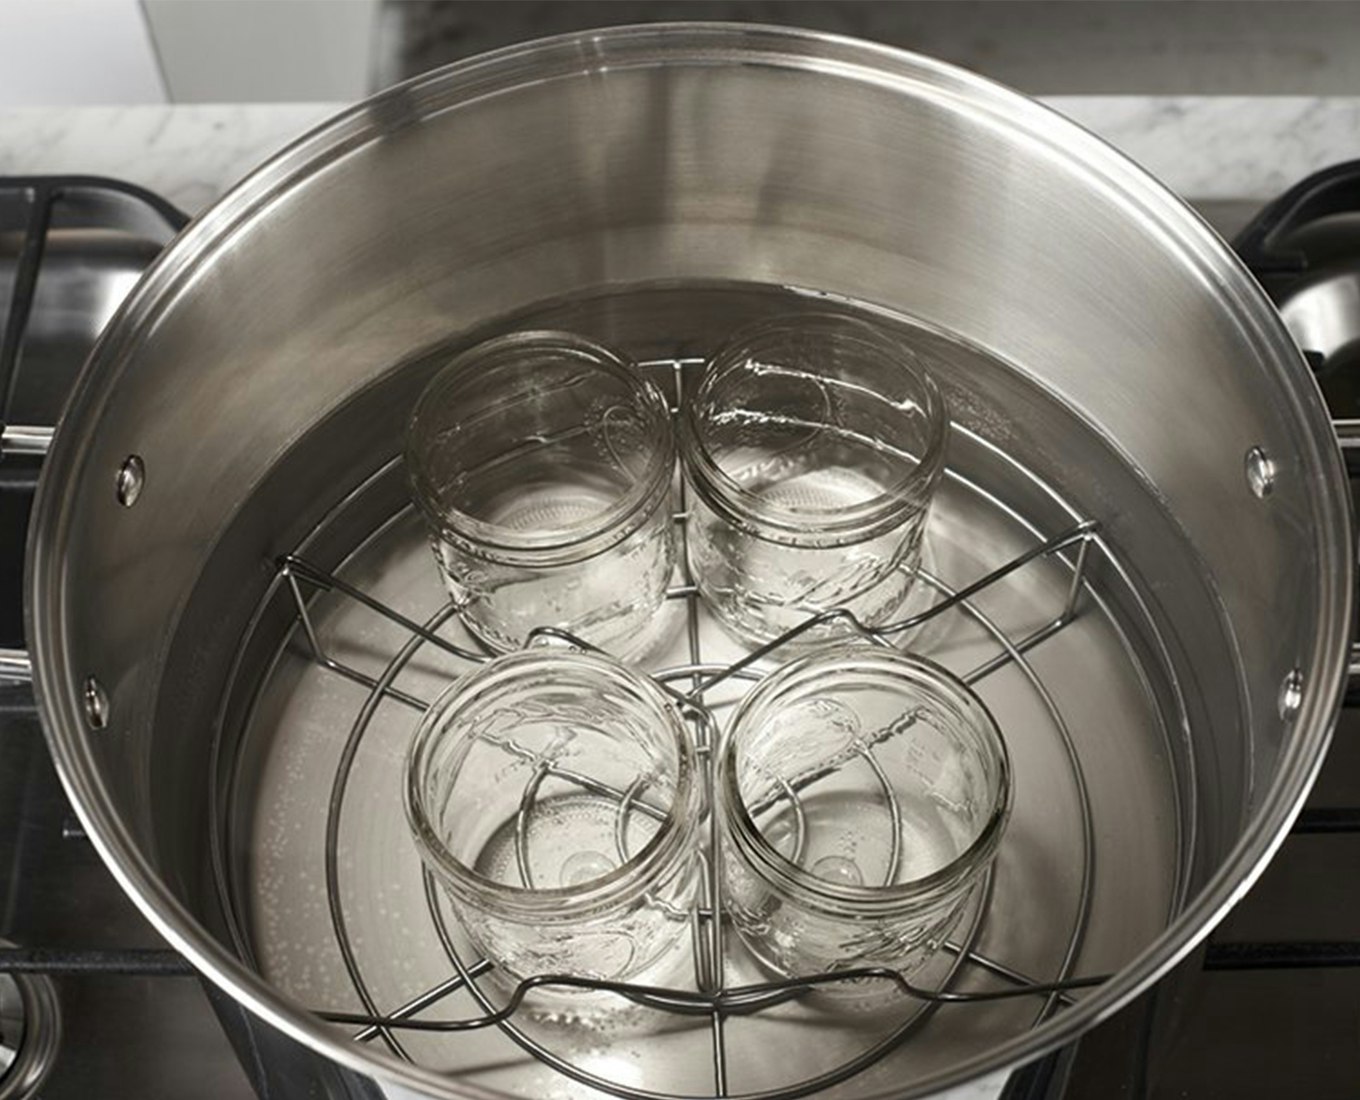
Prepare jars and lids correctly
Sterilization isn't just about cleanliness; it's about creating a safe environment for the seal. Before you fill your jars, start with hot, clean glass. Wash your mason jars in hot, soapy water and rinse them well. You can keep them hot by running them through a dishwasher cycle or submerging them in a pot of simmering water until you're ready to fill them. Cold jars placed in hot food can crack, so keep the glass warm.
The lids require specific attention. Modern two-piece lids—consisting of a flat disk and a screw band—are engineered for single use. The sealing compound on the flat disk softens during processing to create an airtight bond, but it doesn't bounce back once compressed. Using a reused lid significantly increases the risk of seal failure, which can lead to spoilage or foodborne illness. Check each lid for nicks, dents, or rust before use. If a lid looks damaged, replace it.
Note: Modern two-piece canning lids are designed for single use only. Reusing them compromises the safety of your preserved food.
Screw bands (rings) are different. They do not participate in the sealing process; they only hold the lid in place during processing. You can wash and reuse these bands indefinitely, provided they aren't rusted or distorted. Just make sure they are clean and free of debris before you start your canning session.
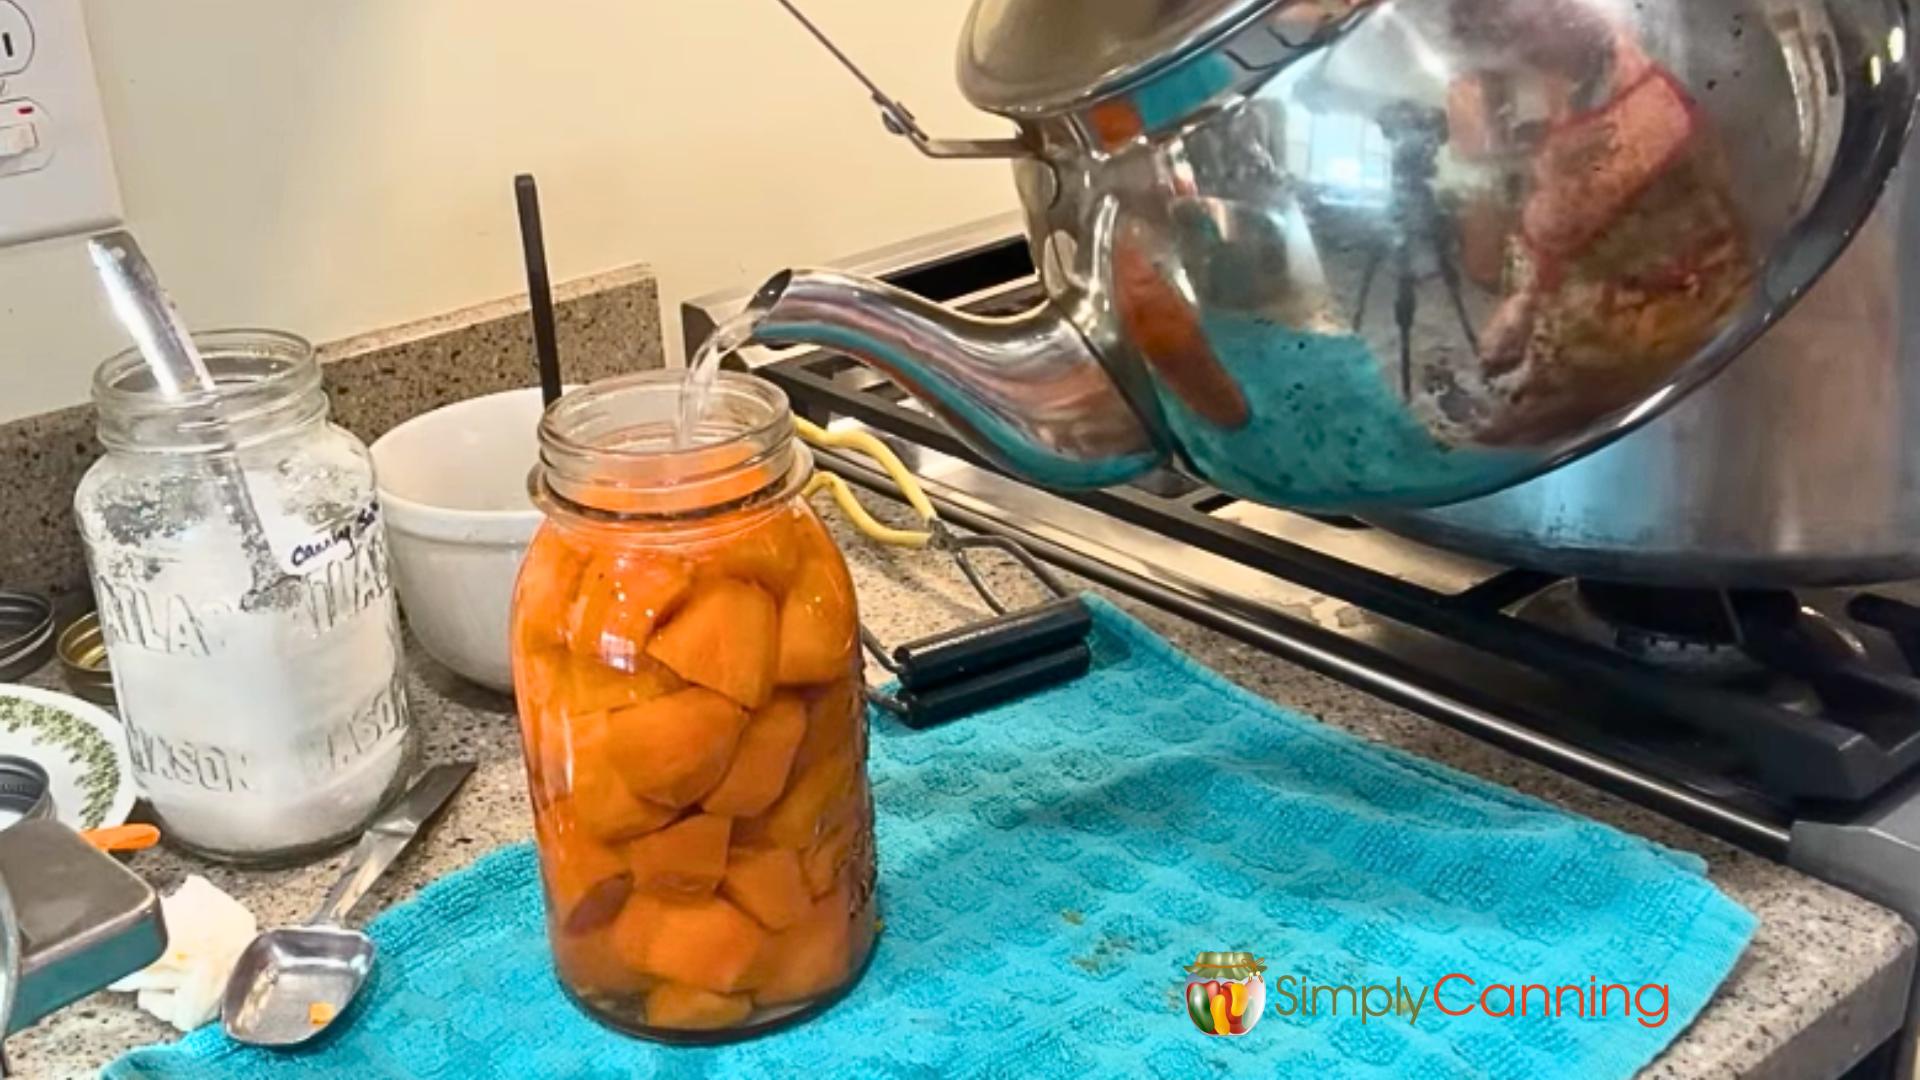
Process cucumbers and onions
Cucumbers and onions are high-acid vegetables that process quickly in a steam canner. The goal is to maintain a steady temperature between 212°F and 230°F to soften the vegetables without turning them into mush. Because steam heat penetrates jars faster than water bath heat, you must watch the timing closely.
After the jars have cooled, remove the bands and check the seals. If a lid does not pop down, refrigerate the jar and use the contents within a few weeks. Store sealed jars in a cool, dark place for up to one year. For the most accurate processing times, always consult a tested recipe from a source like the National Center for Home Food Preservation.
Check seals and store safely
Once your steam canner timer ends, turn off the heat and let the jars sit in the canner until the pressure drops completely and the lid unlocks. Wait for the temperature to drop below 100°F (38°C) before carefully lifting the lid away from you to avoid steam burns. Leave the jars undisturbed in the hot water for five minutes, then remove them using a jar lifter and place them upright on a towel-lined countertop. Do not tilt or turn the jars upside down, as this can break the seal or cause hot liquid to leak out.
As the jars cool, you will hear a distinct "ping" or "pop." This sound indicates that the vacuum seal has formed and the lid has concaved. This usually happens within 12 to 24 hours. Do not test the seal by pressing on the center of the lid while the jars are still hot; the heat can cause false readings. Instead, wait until the jars are completely cool to the touch. To verify the seal, press the center of each lid. It should not flex up or down. If a lid pops back up, the seal failed. Refrigerate these items immediately and consume them within a few days, or reprocess them with a new lid if you are confident in your procedure.
For long-term storage, remove the bands. You can leave the lids on, but removing the bands prevents rust from forming under the lid and makes it easier to detect if a seal has broken later. If bands are tight and rusted, they can be left on, but they should not be relied upon to hold the lid in place. Clean the jars with warm soapy water and dry them thoroughly. Label each jar with the contents and the date of processing.
Store your sealed jars in a cool, dark, and dry place. Ideal storage temperatures are between 50°F and 70°F (10°C and 21°C). Avoid storing jars on top of the refrigerator or near the stove, where heat fluctuations can compromise the seal. Properly processed and sealed steam-canned foods will maintain best quality for 12 to 18 months. While the food may remain safe indefinitely if the seal holds, flavor, color, and texture will degrade over time. Always inspect jars before use; discard any with broken seals, off odors, or signs of spoilage.
-
Lids are concave and do not flex when pressed
-
Bands are removed to prevent rust and seal monitoring issues
-
Jars are labeled with contents and processing date
-
Storage area is cool, dark, and dry (50–70°F)
Common canning questions answered
Steam canning is a fast, efficient way to preserve high-acid foods, but it introduces new variables that differ from traditional water bath methods. Resolving these common questions ensures your jars are processed safely and your food retains the best possible texture and flavor.
No comments yet. Be the first to share your thoughts!