
What is steam canning
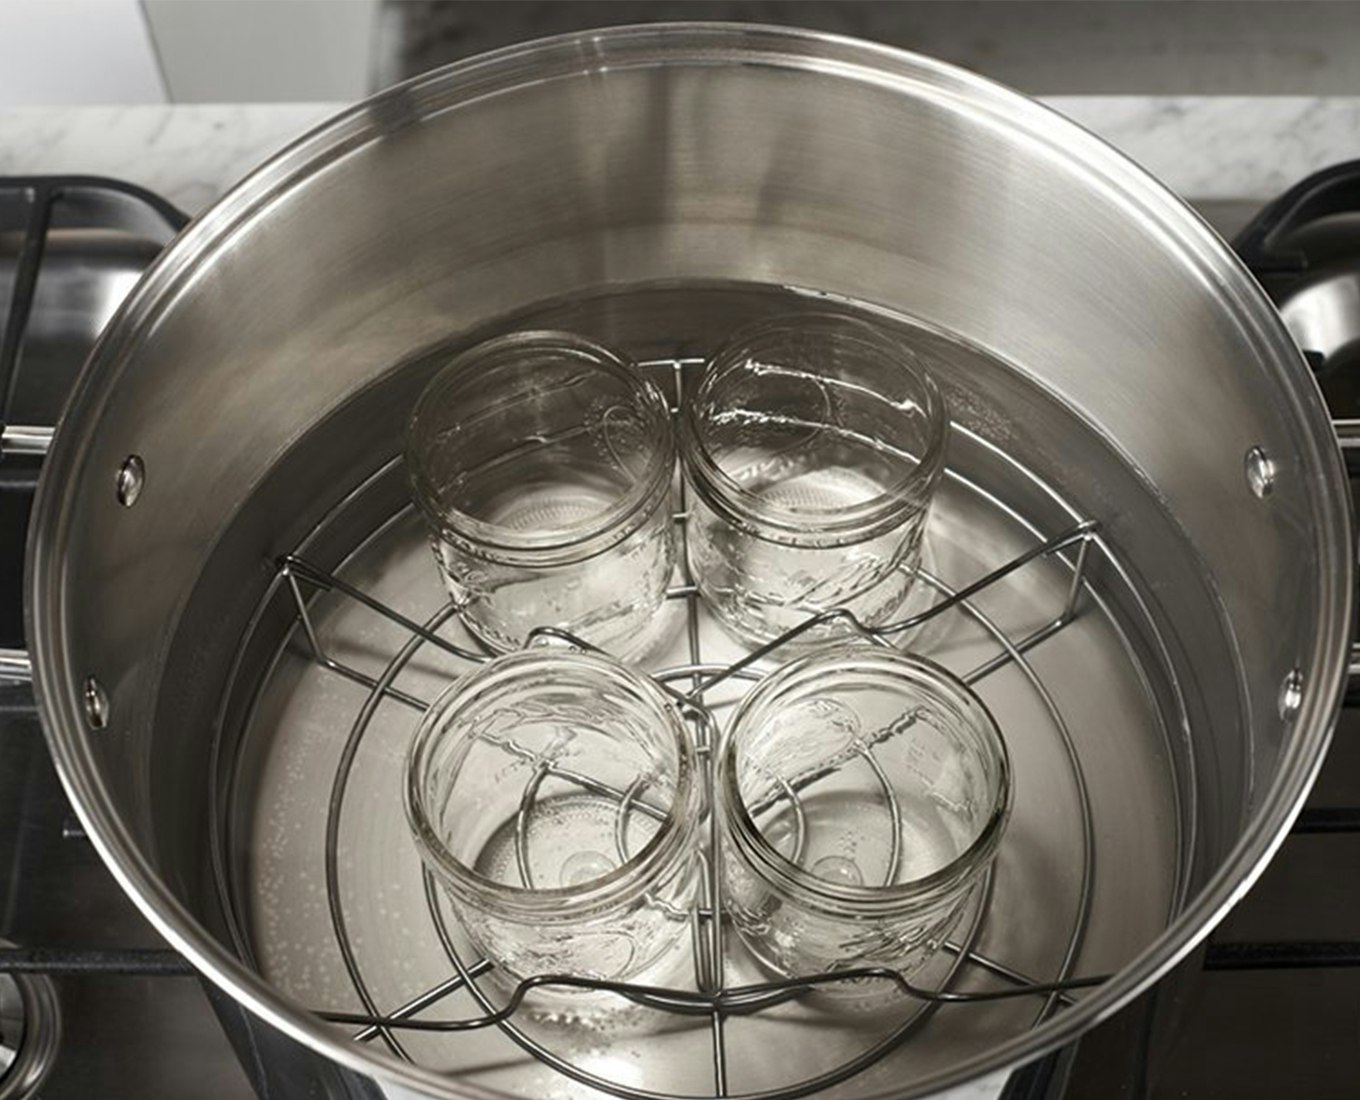
Steam canning is a distinct preservation method that uses saturated steam to heat food inside sealed jars. Unlike water bath canning, where jars are submerged in boiling water, steam canning suspends the jars above a small amount of boiling water. This approach relies on the intense, consistent heat of steam to reach processing temperatures quickly.
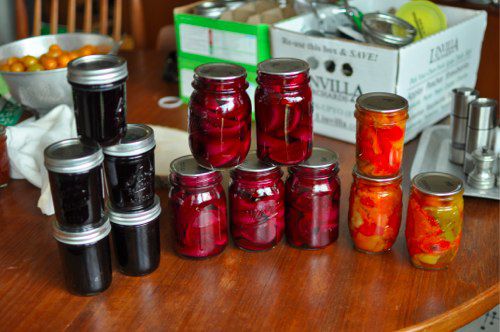
This method is ideal for high-acid foods such as fruits, pickles, and jams. Because steam transfers heat more efficiently than boiling water, processing times are significantly shorter. You can often complete a batch in under an hour, making it a faster alternative to traditional water bath techniques.
Steam canning is not a substitute for pressure canning. It is strictly for high-acid foods (pH 4.6 or lower). Low-acid foods like vegetables, meats, and soups require the higher temperatures of pressure canning to prevent botulism. For the "Just Canning" philosophy, steam canning offers a streamlined, low-effort entry point for preserving seasonal fruits and tangy pickles without the complexity of a pressure cooker.
Gear you need for steam canning
You only need a handful of items to start steam canning safely. The core setup replaces the heavy water bath pot with a specialized steam canner, but the jars and lids remain the same. This section breaks down exactly what is essential for the process and what you can skip.
The steam canner
A steam canner is a wide, shallow pot with a vented lid and a rack. It uses a small amount of water to generate steam, which cooks food faster and uses less energy than submerging jars in boiling water. Look for a model with a transparent lid so you can monitor the steam level without lifting the cover. Brands like Presto and Ball make reliable options that fit standard stovetops.
Quart canning jars
Use standard mason jars designed for home canning. For steam canning, half-pint and quart jars are the most common sizes. Ensure the glass is free of chips or cracks, and that the rims are smooth. The jars must be heat-proof and specifically labeled for canning, not regular storage jars, which can shatter under thermal stress.
Reusable lids
Modern canning lids feature a two-part design: a flat metal disc with a sealing compound and a reusable screw band. The flat disc is single-use; it softens the compound to create a vacuum seal during processing. The screw band is reusable but should be inspected for rust or bent threads. Never reuse a flat disc, as this compromises the seal and food safety.
Comparison: Steam vs. Water Bath
Choosing between a steam canner and a traditional water bath canner depends on your stove and efficiency needs. The table below highlights the key differences in equipment requirements.
| Feature | Steam Canner | Water Bath Canner |
|---|---|---|
| Water Usage | Minimal (1-2 inches) | High (jars submerged) |
| Heating Speed | Faster | Slower |
| Stove Compatibility | All types (check lid material) | All types |
| Jar Submersion | No | Yes |
Prepare jars and lids for reuse
Before you load the canner, every jar and lid must meet strict standards. Reusing containers saves money, but it also shifts the responsibility for safety entirely to you. A compromised jar or a reused lid that no longer seals properly is the most common cause of spoilage in home canning. Treat this inspection as non-negotiable.
Inspect the glass
Hold each jar up to the light. Look for any hairline cracks, chips on the rim, or deep scratches. Even a tiny defect can cause the jar to shatter under the heat of steam canning or fail to seal. Discard any jar with damage. The rim must be perfectly smooth; a single nick will prevent the lid from sitting flat, creating a gap where bacteria can enter.
Clean and sanitize
Wash jars in hot, soapy water and rinse thoroughly. If you are not filling them immediately, keep them hot by storing them in a dishwasher on the "sanitize" cycle or in a low-temperature oven. Hot jars are less likely to break when filled with hot food. Lids and bands do not need to be sanitized in the same way, but they must be spotless.
Check reusable lids
This is the most critical step for safety. Reusable lids (often two-piece metal lids with a separate rubber gasket) can be reused, but only if the rubber seal is in perfect condition. Inspect the rubber gasket for cracks, stiffness, or flattening. If the rubber does not spring back when pressed, replace it. A dried-out gasket will not create the vacuum needed to keep food safe. Bands (the metal rings) can be reused indefinitely as long as they are not rusted or bent, but they must be clean and free of debris.
Just Canning: The Step-by-Step Process
With your steam canner preheated and jars sterilized, the workflow becomes a steady rhythm. The goal is to move quickly from filling to sealing while keeping the heat in the jars. This prevents thermal shock and ensures the steam can do its job effectively.
1. Fill the Jars
Ladle your hot food directly into the hot jars, leaving the headspace specified in your recipe. Wipe the rims with a clean, damp cloth to remove any residue that might prevent a proper seal. Place the lids and screw bands on fingertip-tight; do not overtighten.
Place the prepared lids on the jars and screw the bands on until they are fingertip-tight. Avoid overtightening, which can trap air and prevent the lid from sealing properly during processing.
2. Load the Canner
Carefully lower the filled jars into the steam canner basket using a jar lifter. Ensure the jars are upright and not touching each other or the sides of the canner. This spacing allows steam to circulate freely around every surface.
Use a jar lifter to place jars upright in the steamer basket. Keep jars spaced apart so steam can circulate evenly around each one. Avoid letting jars touch the bottom or sides of the canner.
3. Process with Steam
Cover the canner and bring it to a full boil. Once a steady, vigorous steam is escaping from the vent, start your timer. Maintain a steady boil for the entire processing time listed in your tested recipe. Do not add water to the reservoir during this phase.
4. Cool and Check Seals
Turn off the heat and let the canner cool naturally. Once the pressure or steam gauge drops to zero, carefully remove the jars and place them on a towel-lined surface. Leave them undisturbed for 12 to 24 hours. After cooling, press the center of each lid; if it doesn’t flex, the jar is sealed.
Allow jars to cool completely on a towel-lined counter. After 12–24 hours, check seals by pressing the center of each lid. A sealed lid will not flex up and down. Remove the screw bands and store the jars.
Troubleshooting common sealing issues
A failed seal is the most common hurdle in steam canning, but it is rarely a mystery. Most sealing failures stem from simple, correctable errors in preparation or timing. By addressing these specific points, you can ensure your Just Canning results are safe and reliable.
Rim residue and air bubbles
The most frequent cause of a failed seal is food residue on the jar rim. Even a small speck of fruit skin or syrup prevents the lid from creating an airtight bond. Before placing the lid on the jar, wipe the rim with a clean, damp cloth. This simple step removes any debris that could interfere with the seal.
Air bubbles trapped inside the jar can also compromise the seal by creating pressure points. After filling the jar, run a non-metallic utensil around the inside to release trapped air. Tap the jar gently on the counter to help bubbles rise. Wipe the rim again before screwing on the band to ensure a clean surface.
Band tightness and processing time
The tightness of the band is critical. Screw the band on "fingertip tight"—just until resistance is met. Overtightening can prevent air from escaping during processing, leading to seal failure or lid distortion. The band should be secure enough to hold the lid in place, but loose enough to allow air to escape.
Under-processing is another common issue. Steam canners require precise timing based on altitude and recipe type. Ensure your canner is at full pressure and the timer starts only when the steam begins to flow steadily. Refer to tested recipes for accurate processing times to avoid under-processing.
What to do with a failed seal
If a jar does not seal within 24 hours, you have two options. You can reprocess the jar with a new lid, ensuring the rim is clean and the band is fingertip tight. Alternatively, refrigerate the jar and consume the contents within a few days. Never store unsealed jars at room temperature, as this poses a food safety risk.
Frequently asked questions about steam canning
Steam canning is a modern method for preserving high-acid foods, but it comes with specific safety rules and storage expectations. Here are the most common questions about lid reuse, food longevity, and safety limits.
Always follow tested recipes from reliable sources like the USDA or Extension services. When in doubt about acidity or processing times, stick to established guidelines to ensure your food stays safe.
No comments yet. Be the first to share your thoughts!