
The shift in canning methods
Water bath canning is the traditional way to preserve garden harvests, but steam canning is now a common alternative. While both methods use heat to kill bacteria and seal jars, they aren't interchangeable for every recipe.
Canning isn’t a static practice; it evolves with our understanding of food science and technology. While the core principles remain the same – applying heat to destroy microorganisms and create a vacuum seal – the methods we use to achieve this are always being refined. The rise of steam canning reflects this, offering a potentially faster and more energy-efficient alternative to the traditional water bath. However, it's not a simple swap.
The National Center for Home Food Preservation (NCHFP) provides the testing data needed to use these methods safely. I've looked at their latest guidelines to see where steam canning actually works and where it fails.
This isn’t about dismissing old methods or blindly embracing new ones. It’s about understanding the nuances of each, recognizing their strengths and limitations, and ultimately prioritizing safety. Because when it comes to canning, a mistake isn't just a wasted jar of food; it could pose a serious health risk.
How water bath canning works
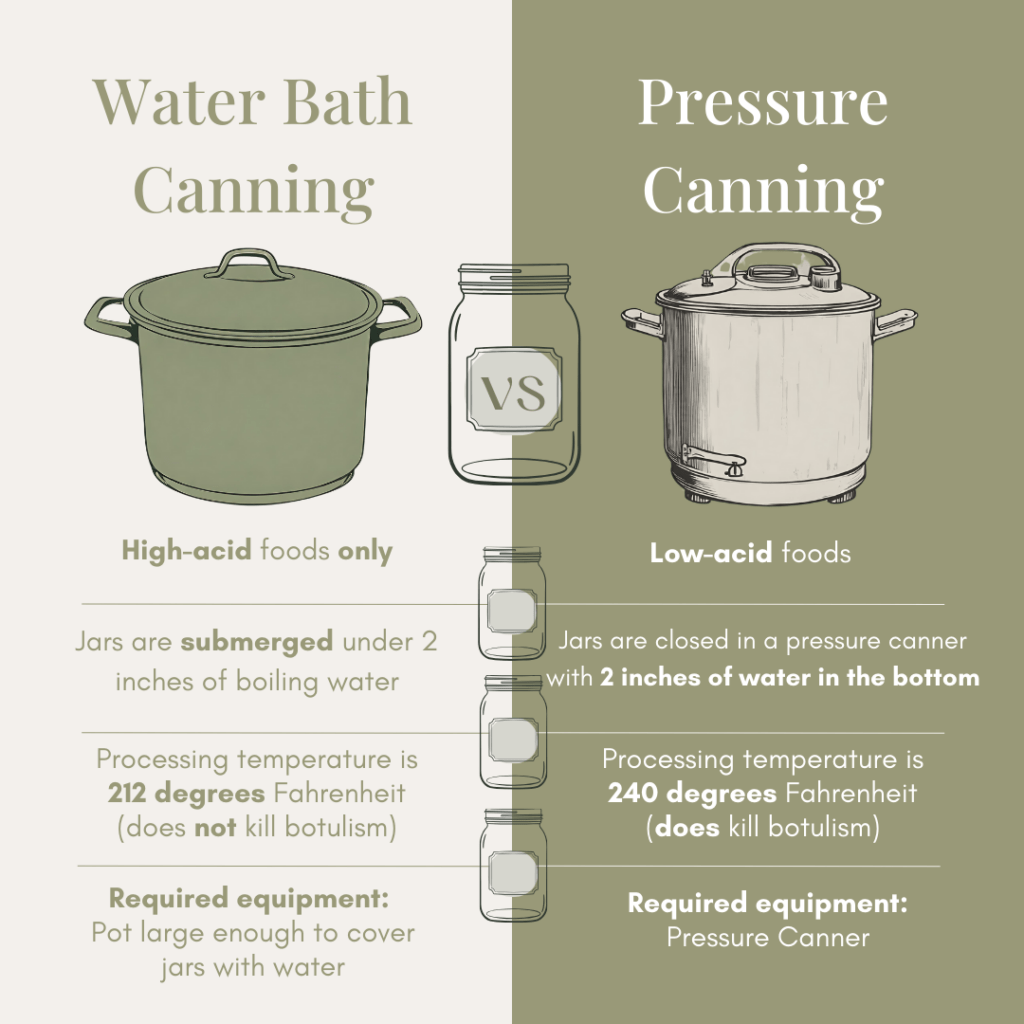
Water bath canning relies on the principle of immersing jars of food in boiling water to create a vacuum seal. This method is effective because the heat destroys yeast, molds, and enzymes that cause spoilage, while the vacuum seal prevents new microorganisms from entering. It’s a time-tested technique that has safely preserved food for generations. The process works best with high-acid foods, which have a pH of 4.6 or lower.
High-acid foods—like fruits, jams, jellies, pickles, and tomatoes with added acid—naturally inhibit the growth of Clostridium botulinum, the bacterium that causes botulism. The boiling water bath provides sufficient heat to destroy any remaining microorganisms and create the necessary vacuum. It’s important to note that low-acid foods (vegetables, meats, poultry) require a pressure canner to reach temperatures high enough to kill botulism spores.
The equipment needed for water bath canning is relatively simple and affordable. You’ll need a large, non-reactive pot (stainless steel or enamel-coated) with a tight-fitting lid and a rack to keep the jars off the bottom. Jars specifically designed for canning are essential, along with new lids and rings. Other helpful tools include a jar lifter, a wide-mouth funnel, and a bubble remover/headspace tool.
Following tested recipes from reputable sources is absolutely critical. These recipes provide precise processing times based on the food’s acidity, jar size, and altitude. Deviating from these times can compromise the safety of your canned goods. Seal failures can occur for a number of reasons, including chipped rims, improper lid application, or insufficient headspace. A failed seal is indicated by a bulging lid or a jar that doesn’t “ping” when pressed in the center.
Seals fail sometimes. If a lid doesn't pop down, put the jar in the fridge and eat it within a few days. You can also try reprocessing it with a fresh lid within 24 hours, but I usually just eat it to be safe.
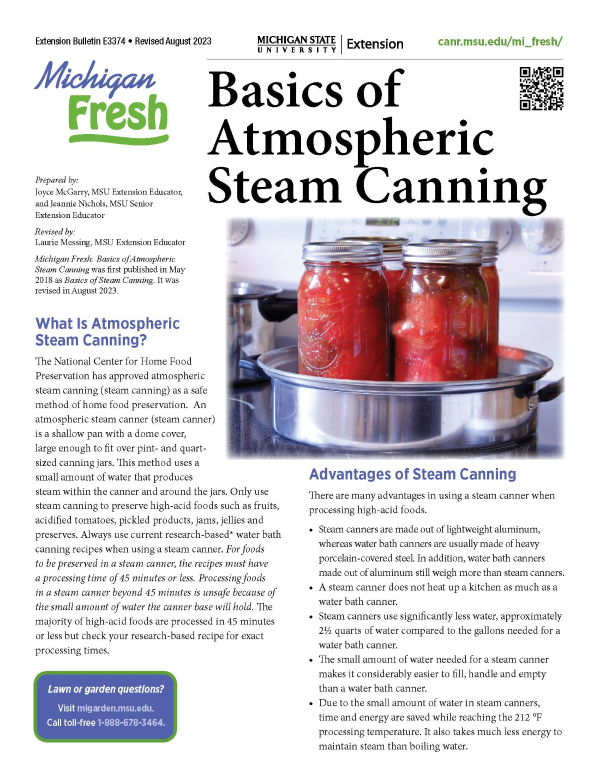
Steam Canning: How Does It Work?
Steam canning utilizes the power of steam, rather than boiling water, to process jars of food. A steam canner consists of a large pot with a raised rack and a tight-fitting lid that traps steam. As the water boils, it creates steam that circulates around the jars, heating them to the required processing temperature. This method uses significantly less water than traditional water bath canning.
The key difference lies in the heat transfer. In water bath canning, the jars are directly immersed in boiling water, providing consistent heat. In steam canning, the heat is transferred through the steam, which can be less direct. This difference in heat transfer is why steam canning is not suitable for all foods. The SDSU extension explains this well, outlining the specific requirements for steam canning to be effective.
The equipment needed for steam canning includes a dedicated steam canner, canning jars, new lids, and a jar lifter. Some steam canners have built-in timers, which can be helpful, but are not essential. It’s a common misconception that steam canning is simply a faster version of water bath canning. While processing times may be slightly shorter in some cases, the underlying principles are different, and safety depends on understanding those differences.
Many canners are drawn to steam canning for its potential energy savings and reduced water usage. However, it’s crucial to remember that these benefits don’t outweigh the importance of safety. Steam canning requires careful monitoring and adherence to specific guidelines to ensure proper heat penetration and a reliable seal. It's easy to think you're saving time, but cutting corners can have serious consequences.
Safety rules for high-acid foods
The NCHFP is the gold standard for home canning safety, and their guidelines are clear: steam canning is not a universally safe substitute for water bath canning. According to the NCHFP, steam canning is only approved for processing high-acid foods with a pH of 4.6 or lower, and even then, only under specific conditions. This is not a matter of opinion; it's based on scientific research and a thorough understanding of heat penetration and microbial growth.
Specifically, the NCHFP approves steam canning for jams, jellies, and pickles processed in half-pint or pint jars. It is not approved for processing fruits, tomatoes (even acidified tomatoes), or any other high-acid food in quart jars. The larger jar size requires longer processing times, and the NCHFP has determined that steam canners cannot consistently deliver the necessary heat penetration for quart jars. This is a non-negotiable safety rule.
The reasoning behind these restrictions is rooted in the physics of heat transfer. Steam canners may experience temperature variations and inconsistent steam flow, especially at higher altitudes. These variations can affect the heat penetration into the jars, potentially leaving pockets where botulism spores could survive. The NCHFP’s recommendations are designed to account for these potential inconsistencies.
Here's a quick breakdown of approved and unapproved foods for steam canning, according to the NCHFP:
Approved:
* Jams and jellies (half-pint or pint jars)
* Pickles (half-pint or pint jars)
Unapproved:
* Fruits (all jar sizes)
* Tomatoes (all jar sizes, even acidified)
* Vegetables (all jar sizes)
* Meats, poultry, and seafood (never)
Using tested recipes and following processing times exactly is paramount. Do not attempt to adapt recipes or modify processing times. Deviation from NCHFP guidelines can lead to spoilage, and more seriously, the risk of botulism. Remember, botulism is a potentially fatal illness, and prevention is the only effective defense.
- Jams and jellies (half-pint or pint jars)
- Pickles (half-pint or pint jars)
Food Type Suitability for Canning Methods
| Food Type | Water Bath Canning | Steam Canning | Notes |
|---|---|---|---|
| Pickles | Approved | Approved | Follow tested recipes for proper acidity. |
| Jams & Jellies | Approved | Approved | High sugar content contributes to preservation. |
| Tomatoes (Acidified) | Approved | Approved | Requires added acid (lemon juice, citric acid) for safety. |
| Peaches | Approved | Approved | Use tested recipes to ensure adequate heat penetration. |
| Green Beans | Not Approved | Not Approved | Low-acid vegetables require pressure canning. |
| Carrots | Not Approved | Not Approved | Low-acid vegetables require pressure canning. |
| Salsa | Requires Pressure Canning | Requires Pressure Canning | Typically not acidic enough for water bath or steam canning without acidification and proper recipe formulation. |
| Cucumbers (Dill Pickles) | Approved | Approved | Requires a tested recipe ensuring sufficient acidity for safe canning. |
Illustrative comparison based on the article research brief. Verify current pricing, limits, and product details in the official docs before relying on it.
Comparing processing times
When steam canning is an approved method for a particular food, processing times are often similar to those used in water bath canning, but not always identical. For example, a recipe for strawberry jam using half-pint jars might require 10 minutes of processing time in a boiling water bath and 12 minutes in a steam canner. These differences are usually minor, but it’s crucial to consult the specific recipe for the appropriate processing time.
It’s important to note that these comparisons are only valid when the recipe specifically states that it is suitable for steam canning. Attempting to apply water bath canning processing times to steam-canned foods, or vice versa, is dangerous. The heat transfer dynamics are different, and assuming equivalence could compromise the safety of your canned goods.
The SDSU Extension provides excellent charts comparing processing times for approved foods. These charts demonstrate that while times are generally comparable, there are subtle differences that must be observed. Always prioritize the processing time recommended for the specific method you are using and the jar size you are processing.
Don't fall into the trap of thinking steam canning is a shortcut if a recipe isn't approved for it. The slightly shorter processing times for approved recipes are a benefit, but they don’t justify using the method for foods where its safety hasn’t been established.
The cost of getting started
The initial investment for water bath canning is typically lower than for steam canning. A basic water bath canner can be purchased for around $30-$60, while a dedicated steam canner generally costs between $100 and $250, depending on the size and features. However, these are just starting points. Higher-end water bath canners with features like temperature control and automatic shut-off can cost upwards of $150.
Beyond the canner itself, you’ll need jars, lids, and a jar lifter, regardless of which method you choose. A case of 12 half-pint jars typically costs around $15-$20, while pint jars are slightly more expensive. Lids are sold in packs of 12 and cost around $8-$12. A good-quality jar lifter will set you back around $15-$25.
Over the long term, steam canning may offer energy savings. Because steam canners use less water, they require less energy to bring to a boil and maintain temperature. This can be a significant advantage if you can frequently. However, the energy savings are likely to be modest and may not offset the higher initial cost of the steam canner.
Here’s a rough cost comparison:
Water Bath Canning (Initial):
* Canner: $30-$150
* Jars (12 half-pint): $15-$20
* Lids (12): $8-$12
* Jar Lifter: $15-$25
Steam Canning (Initial):
* Steam Canner: $100-$250
* Jars (12 half-pint): $15-$20
* Lids (12): $8-$12
* Jar Lifter: $15-$25
- A basic water bath pot costs between $30 and $60, while dedicated steam canners usually start around $100.
- * Canner: $30-$150
- * Jars (12 half-pint): $15-$20
- * Lids (12): $8-$12
- * Jar Lifter: $15-$25
- Steam Canning (Initial):
- * Steam Canner: $100-$250
- * Jars (12 half-pint): $15-$20
- * Lids (12): $8-$12
- * Jar Lifter: $15-$25
Featured Products

23-quart capacity · Can be used as a pressure canner or pressure cooker · Durable aluminum construction
This pressure canner is a versatile option for high-acid and low-acid food preservation, offering a reliable method for safe canning.

12-quart capacity · Durable enamel-on-steel construction · Includes rack and lid
This classic water bath canner is an affordable and effective choice for preserving high-acid foods like fruits and pickles.

21-quart capacity · Automated temperature control · Multicooker and steamer functions
This electric water bath canner simplifies the canning process with its automated heating and precise temperature control, ideal for consistent results.

20-quart capacity · Suitable for both water bath and steam canning · Works on all stovetops, including induction
This versatile stainless steel pot accommodates both water bath and steam canning methods and is compatible with all stovetop types, offering flexibility for any kitchen.

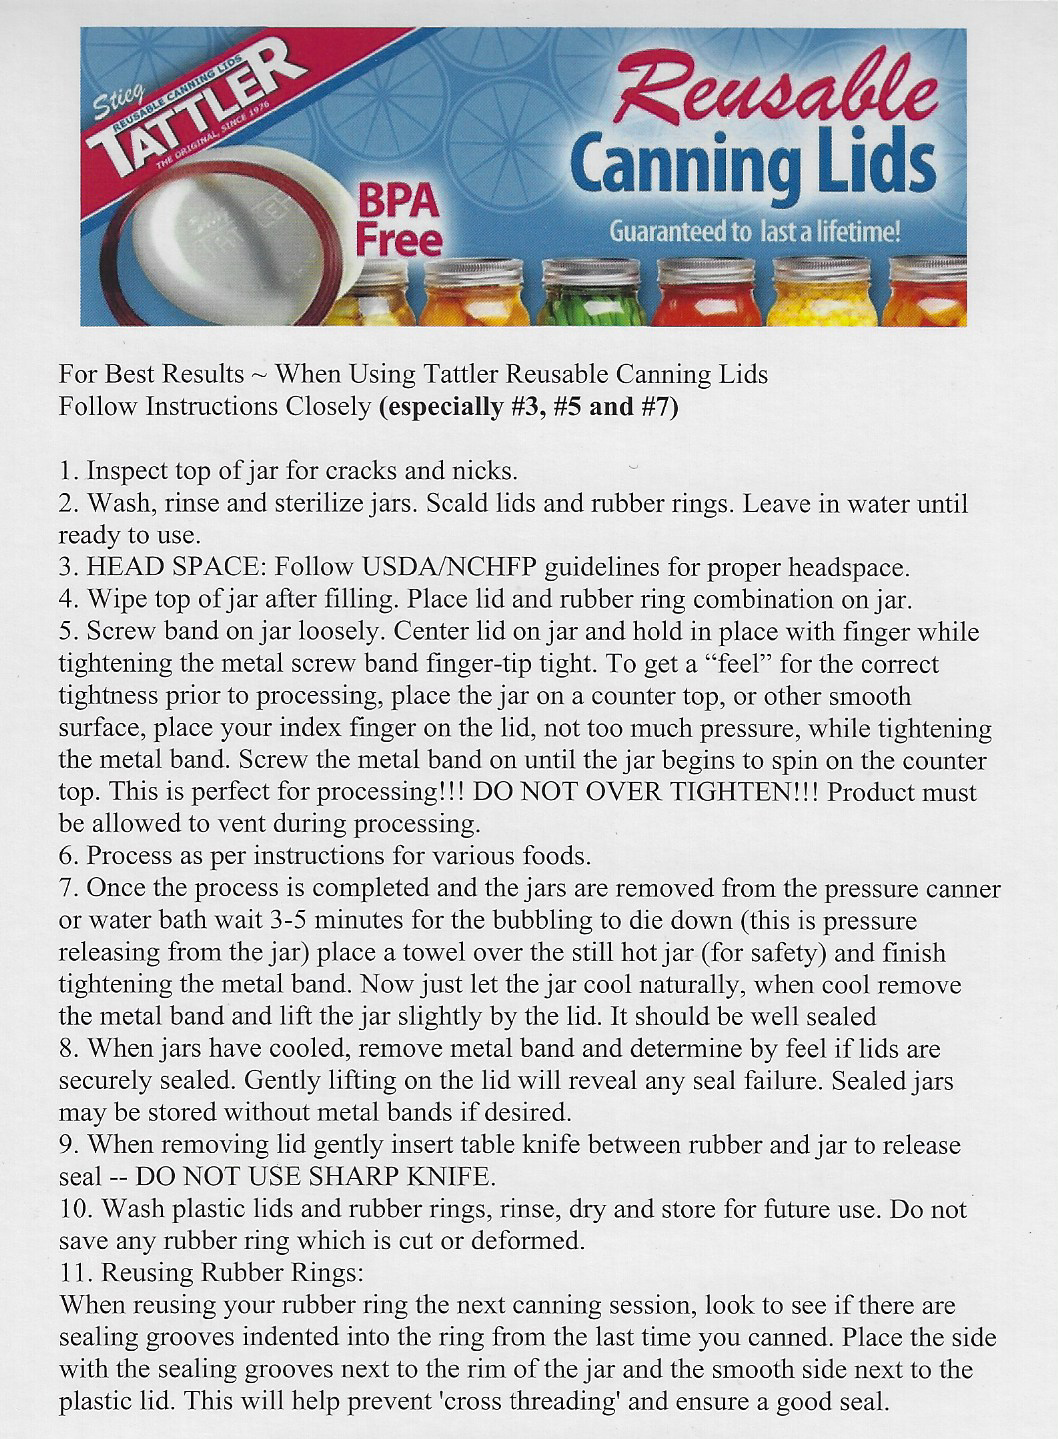
Reusable canning lids · Includes regular and wide mouth sizes · Made in the USA
These reusable lids provide an eco-friendly and cost-effective alternative for sealing jars, ensuring a secure closure for preserved foods.
As an Amazon Associate I earn from qualifying purchases. Prices may vary.


No comments yet. Be the first to share your thoughts!